Your cart is empty.
Click here to purchase!
BLOG
One-way or empites? KEGs for draught beer II.
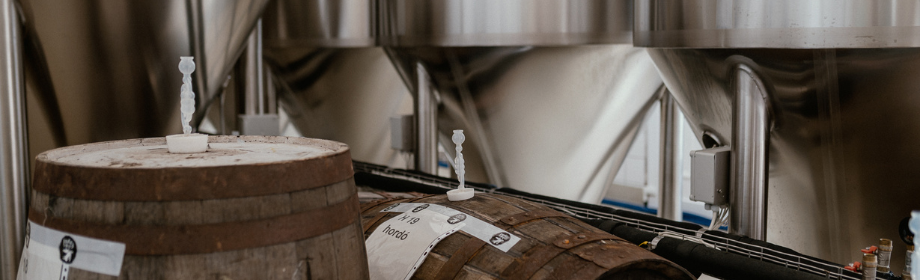
Let’s see how the previously explored kegs work! In metal ones a pipe called the spear connects the coupler with the beer in the bottom, while the propellant gas (usually carbon-dioxide) enters through a pressure valve on the top of the keg. The gas is in direct contact with the beer, and when the tap is opened, the propellant squeezes the liquid through the spear.
The first plastic kegs also used this technique; however, there are a couple issues with this. For one, the beer is exposed to UV radiation. To limit this, brown plastic is usually used (just like with beer bottles, this gives a certain level of protection from light, but it’s far from perfect). Also, while using a spear is fine, but there is room for improvement. In modern single use plastic kegs, an internal bag is placed inside the keg (in some cases combined with a spear). This composite bag is not only covered in light reflecting materials, so there is no risk of developing off flavors due to the uv rays, but it is possible to use non-inert gasses as propellant, since there is no direct contact between the liquid and gas. For example, compressed air can be used to squeeze out the beer, which can be more eco friendly and cost effective than using CO2. This also means that there is no risk of over-carbonation after the keg is filled. It’s important to note also, that one-way kegs leave the factory ready to be filled; there is no need for cleaning and sterilization, only the couplers need to be sanitized. The obvious drawback is the cost of the thing; 30l one-way kegs go for around 15-20 euros/piece, and this has to be included in the price of the beer. Depending on the variety, 10 to 20 % of the total price of a keg of beer can come from one way packaging! This is why on the domestic market, normally these are reserved for imports and nano breweries.
It is fair to ask, what happens after a plastic keg empties? What’s next? All manufacturers, just like every other business in the plastic industry, emphasizes the importance of recycling. Whilst the bags and the pressure holding vessel can’t be safely reused, they can be melted down. Food grade plastics are amongst the best raw materials for the manufacturing of recycled plastic. However, it is important to note, that unlike metals like aluminum, plastics degrade during the recycling process, and can only withstand it without serious degradation a couple of times. It is not really a cycle, more like a chain, where there is a need to add brand new raw materials to recycled plastic to be able to manufacture usable goods. Therefore, it is best to try and focus on reusage, especially if the materials can still be reclaimed at the end of the product’s lifespan. The Dutch manufacturers of the pioneer plastic keg, KeyKeg, started a program of reclamation of their kegs by placing dedicated containers around frequented bars, where the staff of said bars can place their empty kegs. Parts, like the hard plastic stand and handle can be unscrewed and reused to produce new kegs, without melting them down. A good idea for sure, however the scale of the program is unclear to me, but I assume it is solely implemented in the Netherlands, at least for now.
Thanks to human ingenuity though, one can easily find cases of reuse of these plastic kegs! Lots of craft beer venues add padding to the top of said vessels, turning them into seats. But with sufficient DIY skills, one can easily go further. For example, I went ahead and repurposed a couple kegs as plant pots. Important notice! Pressurized kegs have to be degassed before any attempt to puncture or cut them! There are multiple ways of doing this, but if might be easiest to ask the staff of your favorite craft beer bar to this; they are the ones who can supply you with the spent kegs in the first place anyways!
Let’s get back to the plants! Hobby gardening is getting more and more famous, especially in the case of city-dwellers with access to balconies. I am part of this particular demographic, and seeing the out of control raising of prices, I decided to start my own apartment garden. When I started shopping for plant pots, I quickly realized that there is no way to cultivate my own produce cost effectively if I buy expensive gardening equipment. After some brief thinking, a sort of eureka moment came upon me; why would I buy expensive vessels, when I can plant my vegetables into readily available spent one-way kegs, that would be either melted down, or in the worst case just thrown into a dump? I grabbed a couple of kegs and a boxcutter, and started the procedure! It is not a complicated endeavor, there are only a couple of things to keep in mind:
- Make sure that the keg is not pressurized! This is the most important thing to keep in mind. If you misplace a cut for example, it is not the end of the world. Either you find a use for a smaller than expected pot, or recycle it, and grab an another one. But if the keg is under pressure – which can reach values above 3 bar – puncturing it can lead to a violent explosion. In the world of firearms there is a saying, that you have to consider everything loaded, because even a broom handle can fire of a shot. This also applies to pressurized containers! I personally know a guy, who blew up with a plastic keg. Back in the day, when the first one-way kegs hit the bar in Hungary, not everyone got the memo. He was helping out a bartender friend of mine; they were cutting up spent kegs to put into the recycling bin. After puncturing the pressurized keg, it violently burst open sending shrapnel all over the place. A V shaped piece of plastic cut his inner thigh, missing his artery just barely. Blowing yourself up with a keg can ruin your day really badly; avoid it at all costs! Degassed kegs’ walls should easily give into squeezing, if they are firm, that means the keg is under pressure!
- Deconstructing the keg: Polykeg or Keykeg, it doesn’t really matter: both of these brands use a double walled design, with a printed foil in between them. I am no expert when it comes to plants, but I know one thing: drainage is key! The way I build my pots is this: I cut the top of the keg off where it starts to bend. Keep the top, you will need it later! However, you need to remove the inner bag, so cut it out and put it into the bin. Now you have a standing vessel with two walls. The outer layer doesn’t have a bottom (at least not with every design), that’s why you need to save the top part. First you need to remove the inner valve of the coupler, which should be an easy task; just apply a bit of force, and the middle part with the 4 little “fingers” will pop out. Rotate it, so that it can seal the coupler from what would be the interior of the unmodified keg. The result is a half globe or dome, that is sealed. Squeeze this unit into the outer layer, with the coupler facing down! After this is done, you need to make a couple holes! I used a soldering iron to burn holes into the inner layer’s dome, which will be utilized as a perforated false bottom. To finish, you need to squeeze the inner layer back into the outer, which now has the added bottom. Water can drain through these holes into the space between the false bottom and the real bottom, that was originally the top of the keg. All that remains is to plant something into this pot! The whole process takes around 5 minutes if you know what you are doing, and you can save a bunch of money that you can use to buy soil, fertilizer, seeds and hopefully knowledge in the form of some gardening books. I sure could use some!
It goes without saying, that this is but one option for reuse, the possibilities are numerous! I hope that this post won’t just inform, but also inspire You to create something useful from the so called “garbage” laying around abundantly in our modern society. I can guarantee, it is a very uplifting feeling!